Showing posts with label tutorial. Show all posts

Tuesday, June 15

Upcycled Coat Rack Tutorial!

A few months ago (and when I say a few months ago I mean about 7) a friend and I visited our local ReStore while she was in town. That store is AMAZING!! That is a place to go to get the creative juices flowing! While we were there we discussed a possible project and picked up the supplies needed. I think in total (minus the paint) it cost me $7. And with the supplies I made this:

This is a very simple project and I love the end result!
The supplies I used for this project:
An old cupboard door
7 used (I'll call them vintage- it sounds better!) knobs
Black Spray Paint
Sand Paper
Drill

First I sanded the cupboard a bit to help the paint adhere to it.
Ruby loves to help... and she is such a good sander!
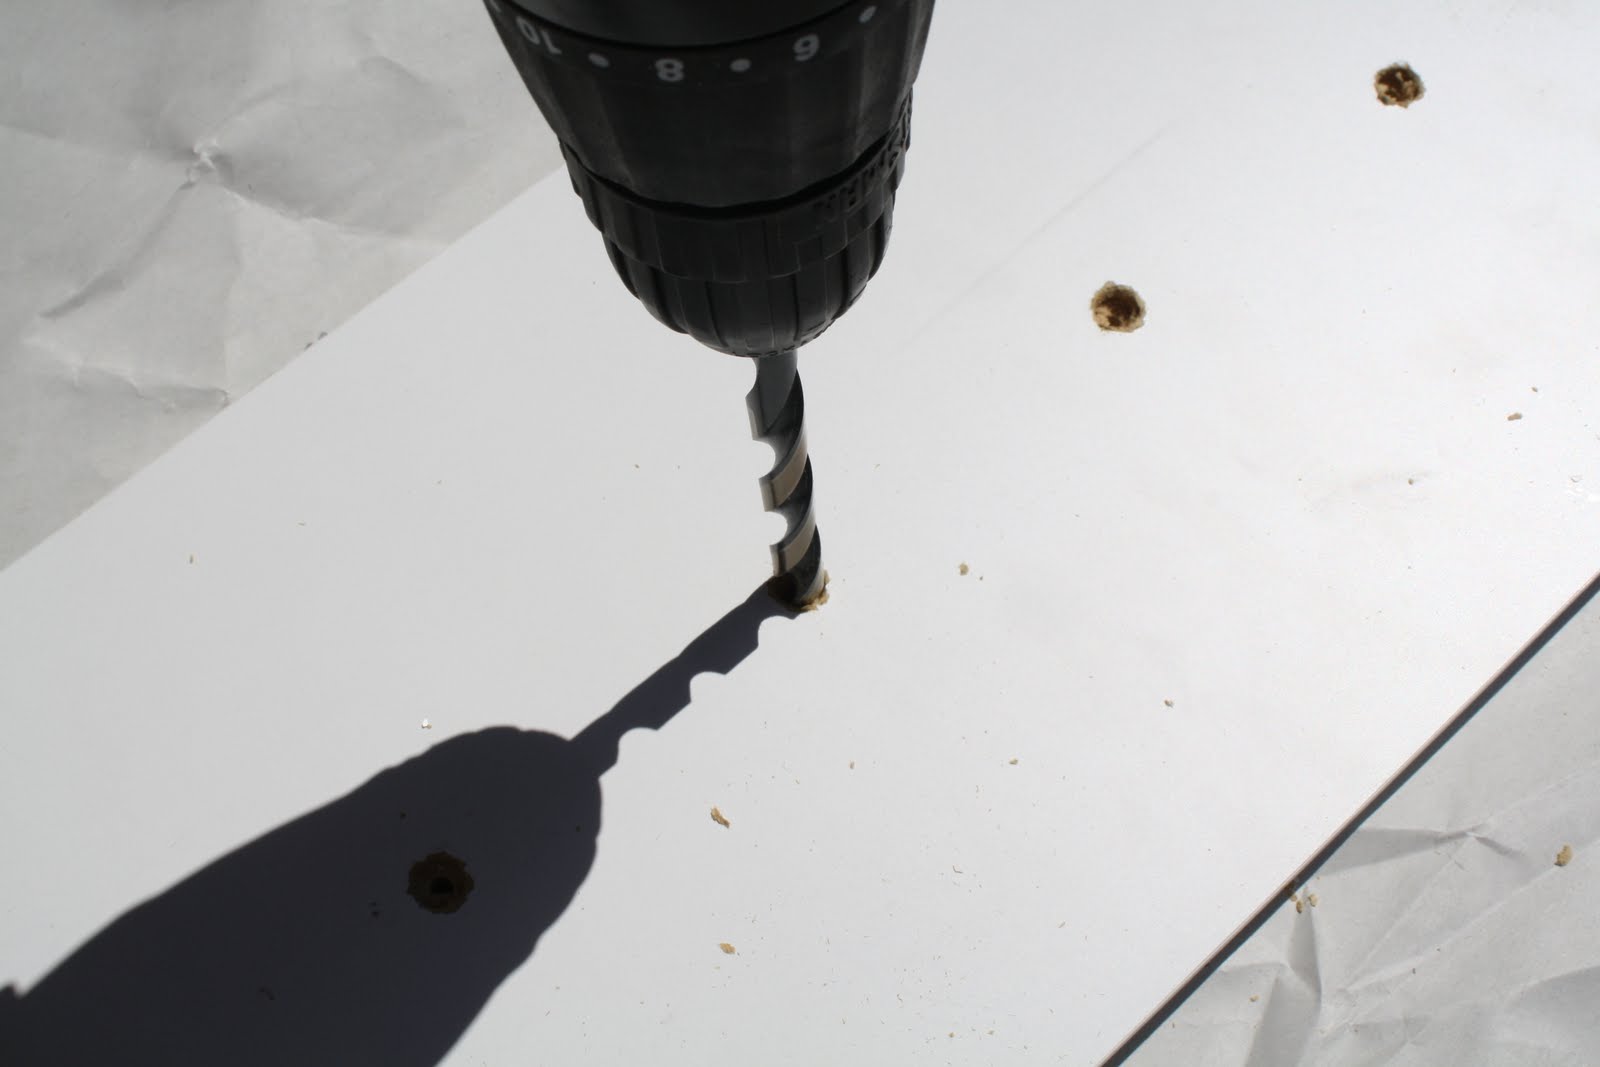
Then I measured and drilled the holes so they would be evenly spaced. (I decided on 7 knobs but you could use as many or as few as you would like)
I used a drill bit that would be the size of my screw so they would just slide it but not move around too much when they were in there.... I can't remember the size and I suppose it depends on your knobs as well and the screws that work with them...
(Ruby loves to drill too... what can I say? A true DIYer at heart...)

Next, I counter drilled about a half of a centimeter on the back so the screws would be sunk in a bit and not mark up the walls- this step would depend on the thickness of the middle of your piece of wood. My cupboard happened to be really thick...
I just used the largest drill bit we had on hand... It has to be the size of your screw head or larger.
Then I spray painted it.

Sanded it down again and spray painted again lightly (just some parts that I missed) then sanded again to get a more rugged/used look.

Then I sprayed with a clear topcoat just to protect it a bit more.

Screwed in the knobs and voila- done.

I love the way it turned out and it is going to look great in my entryway. I made it especially for Ruby so she could hang up her coats there when she came in from play!

Just a few things to review- my cupboard is REALLY heavy- so I am still working out how to hang it on the wall safely- I recommend finding a lighter cupboard, you could use ANY piece of wood that you have or can find, there are a lot of possibilities out there. Definitely check out your local ReStore- it is definitely worth a look, you can get a good deal, reuse, and have your money go to a good cause!

**Now just another note- apparently Kim and I are truely great friends with minds that think alike- because as I was finishing this tutorial I saw that she had just posted a project she had recently finished of her own, here. It turned out amazing! Just another idea along the same lines for you to go with!

Thursday, April 15

Ice Cream Shake- how to

When Justin and I used to work at the science center we would make ice cream with liquid nitrogen. I am telling you it is SO delicious I cannot even describe. Unfortunately liquid nitrogen is a little costly, hard to store, and not readily available for the average consumer. So we had to do it a different way....
We used half and half cream (1 cup each)
feel free to replace that with whipping cream if you are feeling especially thin that day...
about 1 tbsp of sugar
and a dash of vanilla
Put that in a small ziploc bag- take out the air and close- and then place in another ziploc bag...
Double bagging is the key!!
Place that in a large freezer bag- fill with ice and 1/4 cup of salt
Any salt will do- some call for rock salt but table salt will do the trick
Double bag this as well... Or take your chances and wait until it starts to leak and then put in another bag...
Put on some winter gloves and...
SHAKE

Justin and Myers had some mad shaking skills....together they formed one super shaker...
Ruby- great smiler- not such a great shaker....
it takes about 15 minutes and then you will have delicious icecream!!

Enjoy! We did!

Sunday, April 4

Happy Easter! (and easter bucket tutorial)


Happy Easter to all!!!
We had a great Easter watching conference and spending time with each other and friends...
Justin and Ruby wore their easter shirts today.... Myers and I are still looking for our own versions- but I had to post this picture for Addy- I knew she would love it...

Now on to the tutorial

Easter Buckets-
I wanted to make Ruby and Myers some sort of basket to put their easter goodies in and I came up with this-
I love the way this bucket turned out so I thought I would share with all of you how to make them and some interesting pieces of information I learned along the way.
First- gather all of your materials...
Paint, brushes, buckets (I got mine at home depot in the wallpaper aisle... you could also use paint buckets or something like that), acrylic spray (if you are using acrylic paint)- this one says matte but I changed my mind and went with the glossy...

Paint the buckets and be patient. I decided to use acrylic paint so that I would have more choices in color. If I were to ever do this again I would go the spray paint route- it would be much less work. If you do go the acrylic route you have to be VERY patient and VERY careful. Anything will scratch this paint- and it takes ALOT of coats. The green one took about 4 coats and the yellow 6, and then I still had to spray it with the clear coat. Like I said- go with spray paint... save yourself the headache...
Cut out whatever you want in vinyl to decorate your buckets- be sure to do some practice rounds with cardstock first to get the correct sizing. If you don't have access to a cricut or vinyl you could also use paint and decorate with stencils or free hand. The possibilities are endless.
Spray with the topcoat. Be sure to follow the directions and be safe- it is super stinky- even the low odor. I sprayed it outside and it was SO STINKY- but it really works and we haven't had issues with chipping yet. And enjoy!
Here are the end results...

I really love them- and so does Ruby... she is already using it to aid in her hoarding habit...

LinkWithin

Related Posts with Thumbnails